
Assembly & Dis-Assembly Instructions
Assembly Video
Assembly Instructions
Step 1
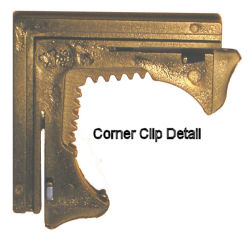
Locate the corner clips (four per frame):
Step 2
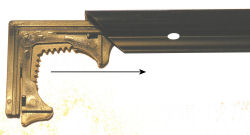
Slide the corner clips into the back channel of the moldings (the narrower of the two). The small bumps on the face of the corner clip must face up as per the image below:
Step 3
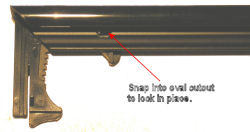
The bumps on the clips must snap into the oval hole in the molding for a secure fit – this should produce an audible “click”:
Step 4
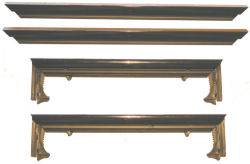
Install all four corner clips, either only on the short moldings (as per the image below) or only on the long moldings – NOT both:
Step 5
Place artwork between your backing panel and glazing panel (if using panels), and slide the combined backing, artwork, and glazing into front channel of one of the moldings with two installed corner clips:

Step 6
Once the artwork sits fully inside the front channel of the molding, the corner clips should no longer be visible, as per the image below:

Step 7
Aligning the front channel with your artwork, slide both of the moldings without clips parallel to your image, until the two moldings lock into the two clips protruding from the first molding:

Step 8
Install the last molding as per the image below:

Step 9
Ensure that the clips have properly locked into the moldings and that there are no loose edges. Assembly is complete!

Dis-Assembly Instructions
Step 1
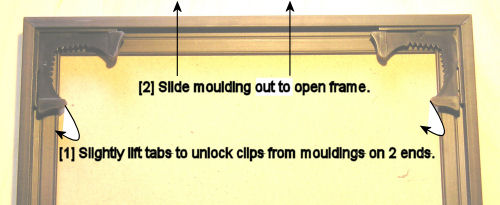
Applying pressure with your thumbs to the base of the corner clip (the point where the curved arrows originate in the image below), push gently away from the frame to 1) unlock the clips from the oval cut-out in the moldings, 2) slide the molding in the direction of the straight arrows below, ,opening the frame:
Step 2
Dis-assemble remaining moldings and corner clips as required.
Questions? Feel free to contact us with any comments, concerns, or problems with assembly and disassembly!