Assembly & Dis-Assembly Instructions
Assembly Video
Assembly Instructions
Step 1
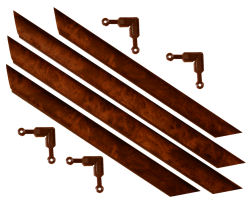
Locate and Moldings and Corner Clips (4 per frame)
Step 2
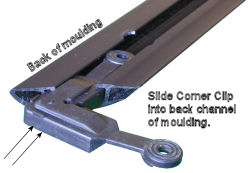
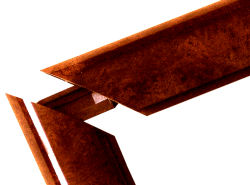
The corner clips slide into back of moldings, as per the arrows in the image below. Note the orientation of the corner clips
Step 3
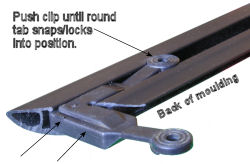
Push the corner clips until the round tab snaps into position:
Step 4
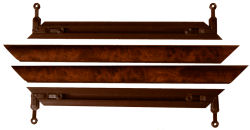
Install two corner clips on either only the short moldings or only the long moldings (not both long and short):
Step 5
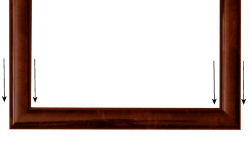
Assemble 3 sides of the frame snapping into the corner clips.
Step 6
Push the moldings as per the arrows below, until the corner clips snap into position:
Step 7
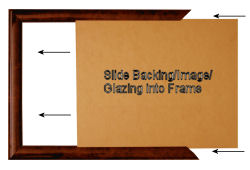
Slide the backing/artwork/glazing into the front channel of the frame moldings, and continue sliding until the artwork is surrounded by moldings on three sides:
Step 8
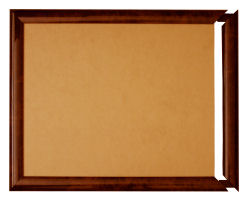
Install the last molding, ensuring that the corner clips fully lock into the moldings:
Step 9
Assembly is complete!
Dis-Assembly Instructions
Step 1
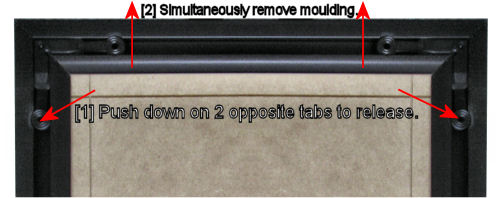
Slightly push down on tabs on each of the two opposite corner clips to unlock the clips from the moldings [1], while simultaneously pushing up on the molding to open the frame [2]:
Step 2
Dis-assemble remaining moldings and clips in a similar manner, as required.
Questions? Feel free to contact us with any comments, concerns, or problems with assembly and disassembly!

